Let's be honest, attaching a handrail to the wall might sound like one of those tasks where you’ll need to channel your inner carpenter—cue the tape measure and drill. But trust me, it's far easier than you think! As someone who’s attached countless handrails, I can tell you: when you’ve got the right tools and a few expert tips (coming your way in this guide), it’s a breeze. So roll up your sleeves and let’s start.
Materials and Tools You Will Need
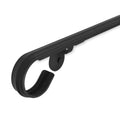
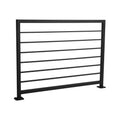
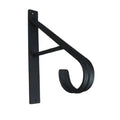
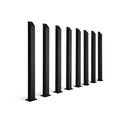
When it comes to attaching a handrail, having the right tools and materials makes all the difference. I like to be thorough, so I’ve got you covered whether you're working with a classic wooden handrail or a sleek metal one (on the images below)—but don’t worry, the basics stay the same.
Tools
- Measuring tape (because precision is key)
- Pencil (for marking those perfect spots)
- Level
- Drill and bits (if we’re talking metal railings, make sure to use adequate drill bits)
- Screwdriver (manual or electric—your choice)
- Stud finder (personal recommendation—do not skip)
- Saw (if your handrail needs a custom fit)
- Safety gear (gloves and glasses—stay sharp, but stay safe)

Materials
- Handrail (wood, metal)
- Handrail brackets
- Screws (check if you need special ones for metal brackets)
- Wall anchors (you know the drill—pun intended—for when studs aren’t an option)
- Metal polish (optional, to keep your handrail looking shiny)
- Sandpaper (to smooth out any rough edges)
- Wood finish or paint (optional, for that perfect polished look)

Step 1: Measure and Mark the Placement
Let’s start with the essentials: determining the right height for your handrail. Typically, the standard height is between 32 and 38 inches from the stair tread, offering both safety and comfort. However, feel free to make slight adjustments if necessary—customization can be key, especially in unique spaces. Once you’ve settled on the height, use a measuring tape to mark the spots for your brackets on the wall, ensuring they’re evenly spaced. And remember, keeping everything level is crucial; a well-aligned handrail not only looks professional but guarantees solid support where it counts.

Step 2: Locate Studs or Use Wall Anchors
Now that you’ve marked the spots, it’s time to make sure your handrail has a strong foundation. Ideally, you’ll want to locate the wall studs for the most secure attachment—handrails need that solid backing. A stud finder will be your best friend here, helping you pinpoint those hidden supports. But if your marks don’t line up with a stud, don’t worry! That’s where wall anchors come in. High-quality anchors can provide the necessary strength to keep your handrail securely fastened, even without a stud.

Step 3: Attach the Handrail Brackets
With your spots marked and the studs (or anchors) located, it’s time to install the handrail brackets. First, grab your drill and create pilot holes at each marked location—this will make sure your screws go in smoothly and prevent any unwanted cracking or splitting. Next, securely attach the brackets to the wall, making sure they’re perfectly level. A wobbly handrail is the last thing you want, so double-check your level as you go. Once the brackets are firmly in place, you’re ready to move on to the next step.

Step 4: Attach the Handrail to the Brackets
Now that your brackets are firmly in place, it’s time to bring it all together by attaching the handrail. Position the handrail carefully on top of the brackets, making sure it’s aligned with the wall and not too close or too far. Once everything looks right, secure the handrail to the brackets with screws. Be sure to tighten everything up, but not so tight that you risk damaging the handrail. Check for level one more time—this is the moment when your precision pays off. A steady, perfectly level handrail is the reward for all your careful planning!

Step 5: Double-Check Everything
Before you call it a day, there’s one crucial step left: double-checking everything. Make sure the handrail is perfectly aligned and level from end to end. Then, give it a gentle shake—this is your test to ensure everything is securely fastened and ready to support weight. All jokes aside, this step is non-negotiable. A handrail isn’t just decorative, it’s a safety feature, and ensuring it’s stable is vital. So don’t skip this final check; a little extra attention here guarantees peace of mind for everyone using it.
If you're a visual learner, check our video guide on how to attach a handrail to a wall:
Conclusion
And there you have it! With the right tools, some careful measurements, and a little patience, attach a handrail to a wall can be a surprisingly straightforward task. Sure, there’s a bit of drilling and leveling involved, but once you’ve got it all secured, you’ll wonder why you didn’t tackle this project sooner. Plus, why not make it a fun weekend activity? Call a friend or family member for an extra pair of hands—maybe even bribe them with pizza! In no time, you’ll have a sturdy, professional-looking handrail and a DIY story worth sharing. I hope this step-by-step guide made your handrail installation a breeze, and if you found it helpful, feel free to share it with anyone else who could use a little DIY inspiration!
FAQs
Can I Attach a handrail without finding studs?
Yes, you can! While studs offer the most secure hold, wall anchors are a great alternative when you can’t align your brackets with a stud. Just make sure to use high-quality anchors designed for the weight of a handrail, and you’ll be in good shape.
How many brackets do I need for my handrail?
A general rule is to attach a bracket every 4 feet, but depending on the length and weight of your handrail, you might need a few more for extra support. Better to add an extra bracket or two than risk a wobbly rail!
How long will this project take?
If you’ve got your materials ready and follow the steps, you’re looking at a couple of hours for the entire attachment. Perfect for a quick weekend project—and even quicker if you call in some help.
Do I need any special tools?
Nothing too fancy! You’ll need basic tools like a drill, measuring tape, level, and screws, along with some specific ones like a stud finder and wall anchors if needed. If you’re missing anything, it’s a good excuse for a trip to the hardware store.


