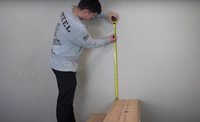
Are you in the middle of renovating or building new stairs and feeling stuck on how to measure the handrail height? Don’t worry! I’ve got a step-by-step guide to help you get it right and keep your project on track.
Handrails aren’t just a nice-to-have—they’re your stairway’s best safety feature, giving everyone from kids to grandparents the support they need to navigate those steps with ease. Plus, let’s be honest, a well-placed handrail doesn’t just keep things safe, it can elevate the look of your staircase, blending function with a touch of flair. So, let’s get you that handrail—it’s time to make it happen!
Essential Tools for Measuring Handrail Height: What You’ll Need to Get Started
Let’s dive into the tools—here’s a complete list of everything you’ll need for your DIY project:
-
Tape Measure:
Used to measure the vertical distance from the stair treads to where the handrail brackets will be mounted on the posts or wall, ensuring the handrail height complies with regulations. -
Level:
Essential for making sure the handrail runs straight along the incline of the stairs, ensuring even height and proper alignment. -
Pencil/Marker:
Mark the spots on the posts or a wall where the handrail brackets will be installed, ensuring consistent placement along the staircase. -
Measuring Stick or Ruler:
Useful for marking equal intervals between the handrail brackets and checking small measurements to ensure accuracy. -
Bracket Template (Optional):
A guide for positioning handrail brackets evenly along the staircase, ensuring uniform spacing and height. -
Power Drill:
Needed for drilling pilot holes into the stair posts or wall to attach handrail brackets securely. -
Stud Finder (for wall-mounted rails):
If mounting the handrail to a wall, a stud finder helps you locate the studs, ensuring the handrail is anchored to a solid surface for maximum support. -
Safety Gear (Gloves and Goggles):
Necessary for protection during drilling and handling tools, keeping your hands and eyes safe while working.

Step-by-Step Guide: Measuring Handrail Height
The key is to keep things simple and precise! If you've never done this before, don't worry—I've been there too, and it’s easier than you might think. By following these steps, you’ll have perfectly measured and installed handrails in no time.
Step 1: Measure from the Stair Treads
The key to getting the right height is starting at the correct reference point: the leading edge of the stair tread (the part of the step where your foot rests).
- At the bottom of the stairs, place the end of your tape measure on the edge of the tread and measure vertically.
- Your target height should typically be between 34-38 inches, as per most building codes. Mark this point with a pencil on the stair post or wall where the handrail will be mounted.
Step 2: Work Your Way Up
Now repeat this process at the top of the stairs. Again, measure from the edge of the top tread vertically, up to the same height (34-38 inches), and mark this point. This will give you the starting and ending points for the handrail.
- Ensure the measurements at the top and bottom are consistent. You want the handrail to run parallel to the slope of the stairs, so being precise here is crucial.
Step 3: Create the Guideline
To ensure your handrail follows the correct line, you’ll need to connect the top and bottom marks. The easiest way to do this is by using a chalk line or a long, straight piece of wood.
- Snap the chalk line between the top and bottom marks. This will give you a visual guide to follow when mounting the handrail brackets.
- If you’re working with stair posts, you can use a level to mark a straight, even line along the posts for the handrail.
Step 4: Mark Bracket Locations
Handrails are held in place by brackets, which should be evenly spaced along the rail. Typically, you’ll want to position brackets every 3-4 feet.
- Begin by marking where each bracket will be mounted along the handrail guideline.
- If your stairs have posts, mark the bracket positions directly on the posts. If you're mounting to the wall, use a stud finder to ensure you’re attaching the brackets to solid studs, ensuring they can support the weight of the handrail.
Step 5: Double-Check Everything
Before you start drilling, take a moment to double-check all your marks and measurements.
- Use a level to make sure your handrail guideline is straight and properly aligned with the stair slope.
- Confirm that your bracket marks are evenly spaced and aligned with the height you’ve measured.
This step is important—taking a few extra minutes now will save you from having to make corrections later.
Step 6: Install the Brackets
Now that your measurements and marks are set, it’s time to install the handrail brackets.
- Drill pilot holes at each of the marked bracket positions to make the installation easier and to prevent the wood from splitting.
- Secure the brackets to the stair posts or wall using the screws provided with the brackets. Make sure they are firmly in place, as these will support the full weight of the handrail.
Step 7: Mount the Handrail
Once the brackets are in place, it’s time to attach the handrail itself.
- Align the handrail with the brackets and make sure it’s following the guideline you marked earlier.
- Secure the handrail to the brackets using the provided screws or fasteners. Start from the bottom and work your way up to ensure it stays level with the line.
Step 8: Final Check and Adjustments
With the handrail mounted, give it a good test before you call the job done.
- Walk up and down the stairs, using the handrail to check its sturdiness and comfort.
- Ensure the handrail is level and securely attached to the brackets.
- If anything feels loose or uneven, make the necessary adjustments now to get it just right.
Handling the Tricky Spots: Tips for Measuring Rails in Special Cases
Curved or Spiral Staircases
When dealing with curved or spiral stairs, measuring the handrail height can be trickier. Instead of relying on a straight-line measurement, follow the curve of the staircase. Measure from the edge of each tread and mark the corresponding height at multiple points along the curve. This ensures the handrail remains at a consistent height relative to the steps.
Uneven or Older Stairs
For older staircases or those with irregular treads, it’s best to measure the handrail height from each step individually. Some steps may be slightly higher or lower, so take measurements at various points to ensure the handrail remains at a comfortable and consistent height throughout the entire run of the stairs. Using a level at each point helps maintain alignment.
Common Mistakes to Avoid When Measuring Stair Rails
-
Measuring from the Floor Instead of the Tread:
A common mistake is starting measurements from the floor at the base of the stairs, rather than from the leading edge of each stair tread. This can result in an incorrectly placed handrail, which may be too low or too high relative to the steps. -
Not Accounting for the Slope of the Stairs:
Many people forget that stairs have a natural incline, which affects where the handrail should be placed. Measuring handrail height as if it’s for a flat surface can lead to inconsistent alignment along the staircase, making the handrail awkward or unsafe to use. -
Ignoring Local Building Codes:
Novice DIYers might not realize that specific building codes dictate minimum and maximum handrail heights for safety. Failing to check and follow these regulations can result in having to redo the project or, worse, creating a hazardous situation.
Conclusion
In the world of DIY, measuring handrail height might seem like a small detail, but trust me, it’s one you don’t want to overlook. With a tape measure, a little patience, and these simple tips, you’ll avoid the rookie mistakes and get it right the first time. And remember—measure twice, install once, and you’ll have a rail that’s safe, stylish, and built to last!


