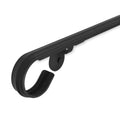
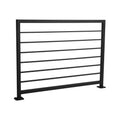
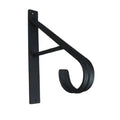
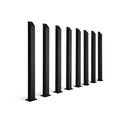
When installing a handrail, there’s one small detail that often gets overlooked, but makes a big difference: the rosette. A rosette is the decorative (and functional) plate that covers the point where your handrail meets the wall. It helps secure the handrail end, hides any gaps or hardware, and adds a polished, finished look to your railing setup.
If you’ve decided to include one in your installation, good choice; it shows you care about both safety and style. And if you’re wondering how to install a rosette the right way, you’ve landed in the perfect place. In this guide, I’ll walk you through the exact tools, tips, and techniques I use myself so you can get it done confidently and cleanly, without guesswork.
Handrail Rosette Installation: Essential Tools and Materials
Tools:
-
Drill with Appropriate Drill Bits: You’ll need this to create pilot holes for screws and possibly to counterbore if you're using wood plugs.
Tip: A cordless drill with variable speed settings gives you more control. Make sure you have both wood and masonry bits if you're unsure about the wall surface. -
Screwdriver or Impact Driver: Used to drive screws into the wall or rosette.
Tip: An impact driver is great for driving long screws into studs without stripping the head. For light-duty work, a basic screwdriver works fine too. -
Level: This ensures your rosette and handrail are installed straight and aligned properly; no one wants a crooked finish.
Tip: A small torpedo level is perfect for tight spaces. Digital levels are a bonus if you want extra precision. -
Measuring Tape: Essential for marking out the correct height and alignment points.
Tip: Choose one that locks in place easily. It’ll save you a lot of frustration when marking. -
Stud Finder: You’ll want to secure your rosette into a stud whenever possible for maximum strength.
Tip: Go for one that can detect both depth and type (wood vs metal) to avoid surprises. -
Wood Glue (Optional): Sometimes used in combination with screws for extra hold, especially if attaching to a wooden base.
Tip: Use sparingly! Too much glue can seep out and affect the finish. -
Sandpaper: Used to smooth out edges around the rosette or clean up after plugging screw holes.
Tip: Stick with 120-150 grit for general smoothing; finer grits are good for finishing touches. -
Wood Plugs or Dowels (Optional)
These are used to hide screw heads for a seamless look, especially in visible or decorative installs.
Tip: Choose plugs that match your rosette wood species and grain direction if you plan to stain.
Materials:
-
Rosettes: A plain handrail-to-wall connection can look abrupt or unfinished. A rosette smooths that transition and hides fasteners, creating a more polished and professional look.
Tips for choosing:
-
Match the style of your home or railing; traditional rosettes tend to be round or floral, while modern ones are square, minimal, or even metal.
-
Material matters: Wood rosettes are ideal for stained wood handrails, while metal ones go better with wrought iron or painted finishes.
-
Size and proportion are key. Make sure the rosette is big enough to fully cover the mounting area without overpowering the railing visually.
You can find rosettes at home improvement stores, specialty stair parts suppliers, or online retailers like Amazon, Etsy, or StairPartsUSA. If you want something unique, consider custom woodworking shops or ornamental iron fabricators.
-
Screws: You’ll need screws to securely fasten the rosette to the wall, and potentially also to attach the handrail end itself.
Tips for choosing:
-
#14 screws are a good starting point because they’re thick enough for strength and long enough to bite into wall studs.
-
Always go at least 2 to 2.5 inches in length if you're anchoring into wood studs.
-
Choose screws with a flat or trim head if you're planning to plug the holes afterward for a seamless look.
If mounting into drywall or masonry (instead of studs), you'll need wall anchors or masonry screws. Always match your fastener to the material behind the wall.
-
Wood Plugs or Dowels: Visible screw heads can make even a well-installed rosette look unfinished. Plugs give you a smooth, continuous look, especially important if you're staining or finishing the rosette.
Tips for using:
-
Choose plugs made from the same wood species as your rosette or handrail. This makes it easier to stain and blend.
-
Go for face grain plugs (as opposed to end grain) if appearance matters, especially in visible spots.
-
After inserting the plug, trim it flush with a chisel or flush-cut saw, then sand smooth.
Wood plugs are sold in hardware stores, woodworking shops, or online. Many rosettes come with matching plugs, but if not, you can buy plug kits or even make your own if you have the tools.
Handrail Rosette Installation: Preparation Steps
1. Locate Wall Studs Using a Stud Finder
The first thing you want to do is find the wall stud behind the drywall. That’s your secure anchor point; much stronger than just screwing into the wall surface. Use a reliable stud finder and slowly run it across the area where you plan to install the rosette. When it beeps or lights up, mark both edges of the stud with a pencil so you can find the center. That’s your best spot for drilling. Don’t assume studs are evenly spaced; not all homes follow perfect 16-inch intervals, so double-check every time.
2. Mark the Desired Height and Position for the Rosette
Once you’ve located your stud, the next step is to mark the height and placement of the rosette. This is where a bit of careful measuring pays off. Most handrails are installed between 34 to 38 inches from the floor. Pick a height that’s comfortable and aligns with the rest of your railing. Use a measuring tape and pencil to lightly mark the center height and the outline of the rosette on the wall. A level helps here too, making sure everything is straight from the beginning saves you from uneven installations later.
3. Ensure the Handrail End Aligns Correctly with the Rosette
Before you drill or screw anything in, grab the handrail and test the fit. You want the handrail end to sit flush against the rosette, with no gaps or awkward angles. Hold it in place and check with a level to make sure it matches the existing slope or horizontal line of your railing. If the fit seems off, now’s the time to trim or reposition. It’s way easier to fix alignment issues before anything’s permanently attached.
Installation Techniques
Attaching the Rosette:
1. Drill Pilot Holes Into the Wall at Marked Positions
Start by holding your rosette up to the markings you made earlier. If everything looks good, drill pilot holes through the rosette and into the wall at the screw locations you’ve chosen (ideally right into the stud).
Use a drill bit slightly smaller than your screws to avoid splitting the wood or damaging the wall. If your rosette is hardwood, go slow to prevent cracking. For extra precision, especially on slippery finishes, tap a small starter hole with a nail punch before drilling. It’ll keep your bit from wandering.
2. Secure the Rosette to the Wall Using Screws
With the pilot holes drilled, it’s time to fasten the rosette in place. Align it again over the holes, and drive the screws through the rosette and into the wall using a screwdriver or an impact driver.
Go slow and apply steady pressure to avoid stripping the screw head. If you’re working with softer wood, be careful not to overtighten! The pressure can crack or warp the rosette. If the wall behind isn’t a stud, use appropriate wall anchors to make sure it’s still solidly secured. After tightening, give the rosette a slight tug to ensure it’s firmly in place.
3. Counterbore the Screw Holes, Insert Wood Plugs or Dowels, and Sand Flush
If you want a cleaner look without exposed screw heads, you can hide them using wood plugs or dowels. After fastening the rosette, just cover the screw holes by inserting plugs into shallow, pre-drilled recesses. Once set, trim any excess so they sit flush with the surface. A bit of sanding will smooth everything out and get it ready for finishing. It’s a small detail, but one that really elevates the overall appearance.
Attaching the Handrail:
Align the Handrail End with the Installed Rosette
Once your rosette is securely mounted, it’s time to bring in the handrail. Carefully line up the end so it meets the rosette face cleanly, without any visible gaps or twisting. This is where your earlier prep work really pays off, because you already checked alignment during the planning stage, this part should feel pretty stress-free.
Still, take a moment to double-check the angle and fit. The handrail should follow the natural slope of your stairs or railing line and sit evenly against the rosette. If needed, lightly mark the contact point to guide the final connection and avoid any last-minute slips or adjustments.
Secure the Handrail to the Rosette Using Appropriate Fasteners or Adhesives
With everything lined up, you’ll need to fasten the handrail securely to the rosette. Depending on your materials, this can be done with screws, brackets, or heavy-duty adhesive.
If you're using screws, be sure to pre-drill into the handrail end to avoid splitting, especially if it’s hardwood. Angle the screws in such a way that they pull the handrail tight against the rosette for a snug connection.
For a more seamless look or when working with decorative finishes, construction adhesive or a strong two-part epoxy can be used. Just make sure both surfaces are clean and dry. Clamp the joint while it cures to prevent shifting.
Conclusion
I’ve laid out everything you need to get this done, with a few extra tips to make it easier and help you avoid mistakes. If you’ve made it this far, there’s really no reason you can’t handle the install yourself. Just take it step by step, and you’ll end up with a solid, clean-looking result.
Looking for professional advice or custom parts? Contact us or browse our handrail collection to get started today.


